CategoryTech Stuff

Things Techie

Pencils and Pennies | Testing Before Production

I’m sure there are a ton of people out there that have had this scenario.

A system fails. Locate the issue. A rush to repair or replace. Update while it’s out of service. Patch related systems and drivers. Add some buttons and bells. Turn it on. Hope for the best. Chase issues. Fix issues.  Hope for the best. Track dependencies. Fix issues. Hope for the best. Fix issues. Prey it works. Fix issues. Hope for the best.

This, to me, represents the path of a lot of technical staff when backs are against the wall. It happens to all of us especially when dealing with production systems in a fluid corporate environment. Management seldom knows, or cares, what it takes to resolve most IT issues. They only see down time and dollars. They seldom approve test and development of new or updated systems because they only see things from a cost and man hour view point. It’s their job. Pencils and pennies.

I came from both sides of this coin. Pun intended. I’ve worked in small business when there simply wasn’t any money for testing new systems and also in very large corporate environment where change is seen as the root evil of the balance sheet. When you work in a department where the bean counters list you as a major red blotch in the bottom line it’s very difficult to justify updates/upgrades let alone a test environment to figure things out before you throw the switch on a whim idea some marketing knuckle head sold to their boss.

I’ve been fortunate, in most cases, to have some testing time before production. I’ve always padded my schedule and budget to allow for it. I did say ‘most cases’.

I recently built a new system for my in house network. It was a file server to replace three other storage devices. I was able to create virtual instances of each of the applications I was considering prior to choosing one for production and also prior to the actual build itself. I researched and destroyed the virtual applications while testing multiple times. I made mistakes and reloaded applications more often than I’ll admit here. I then used everything I learned screwing things up to build what I wanted in a production package.

Here’s the point, There is so much information available for free out there that the only real cost for testing and development has been reduced to time. I understand that in a firestorm, time is what you don’t have, however, when things are quite and systems are running as they should be you should be expanding your knowledge of how to make things better. Test beds and virtual environments are so easy to package these days at such a minimal cost they are easy to justify to the bean counters as preventative maintenance.

My flow normally follows the path of idea, virtual environment, AWS or Digital Ocean configurations then proposal and funding for production hardware. I can have  multiple systems packaged over dozens of virtual machines in any combination for concept, testing and approval. I  then will have a proven package in a working environment prior to ever putting together a proposal and I can present it in a functional product with confidence of proof of concept. If they say no I delete it. I has only cost me time and brain cells. No RMA’s required.

Lightning and Thunder! UPS Go BOOM!

We had company over the last week which was nice. We laughed about everything, spent some time on the lake and even had a chance to take them out in the Jeep to climb around the desert for a morning.

Image result for lightning lake havasu city
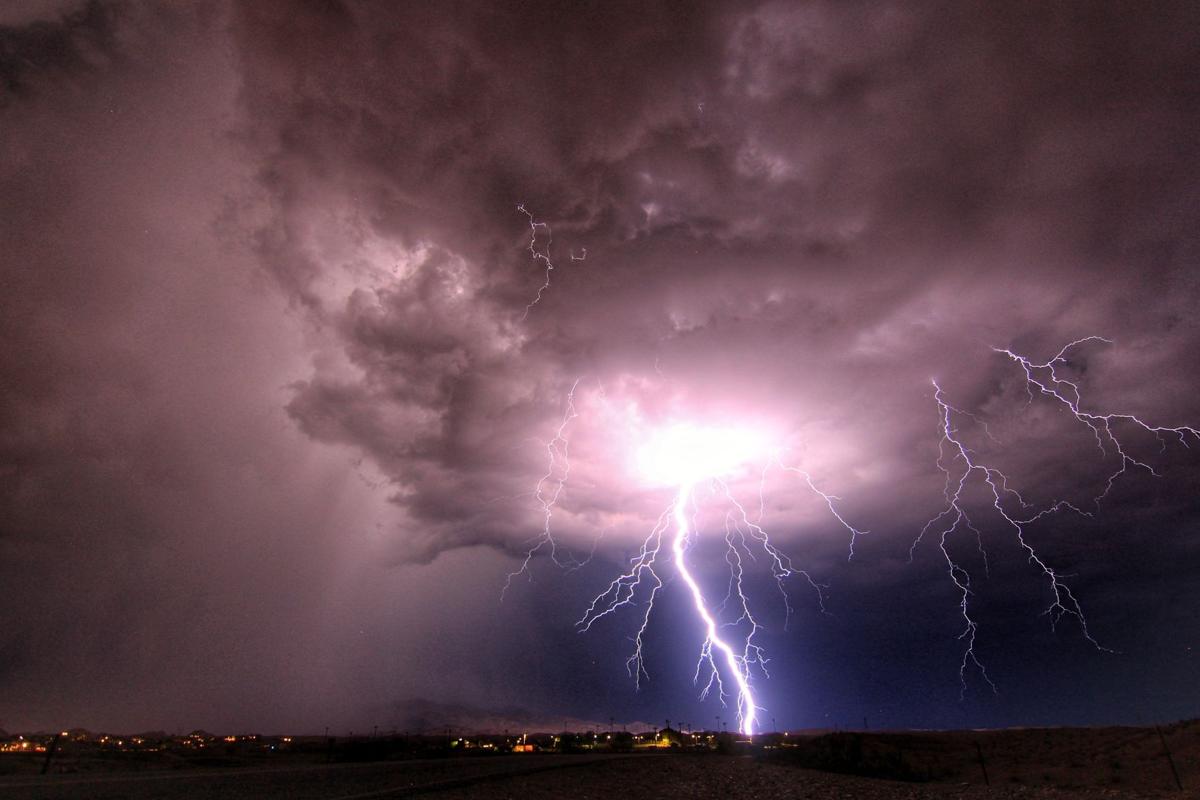
We woke up to a rumbling of thunder and lightning one early morning and in a blink of an eye a huge bolt of lightning hit near by and the house went dark for a couple seconds. I was instantly awake and listened patiently for each of my systems to begin their shutdown cycle and send out notifications to my phone.

One message, then another, then another dinged on my phone. It’s a lot scarier than when I simply pulled the plug to test everything. All seemed to be going fine as I watched my phone but I never got the all clear message from the system telling me it was back on line.

Those few minutes seemed to last hours! I had to get up. No way I was going back to sleep.

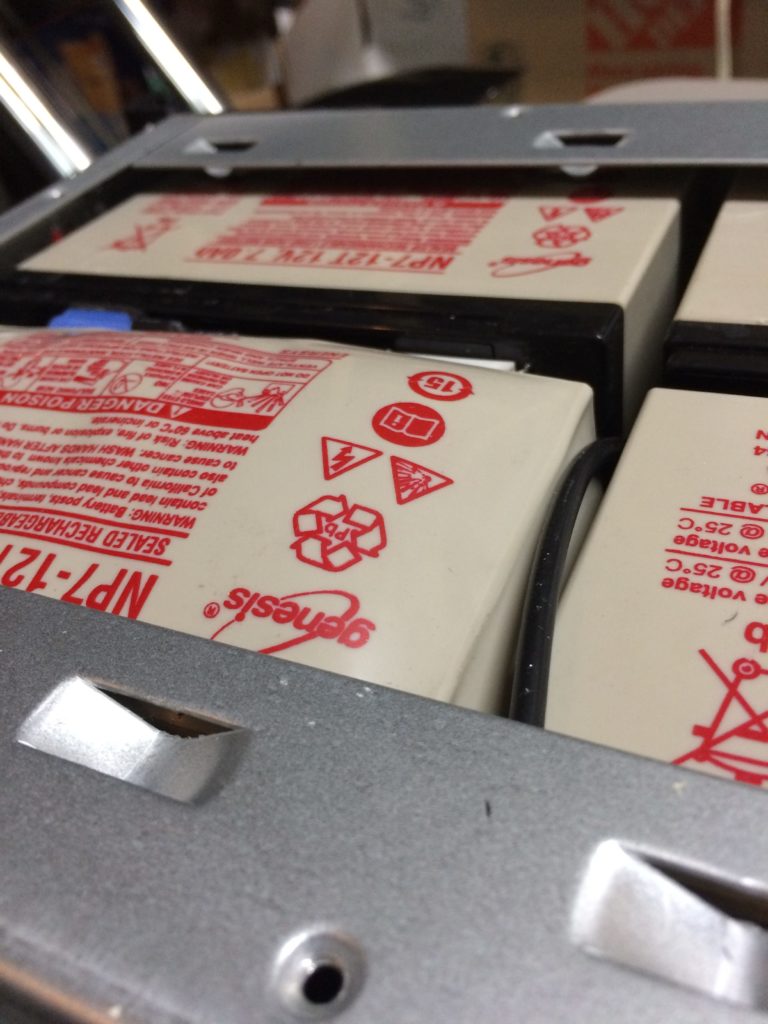
So even though the spike wreaked havoc on a UPS circuit board, killed a couple batteries and melted the filter stack to the point it was necessary to replace the UPS itself, the system actually did what it was supposed to do. My system was protected, fail-over worked correctly and the FreeNAS file server was isolated to protect itself. All the other systems came up and notifications went zipping to my phone as planned.

Stings a bit to buy another UPS but it’s penny’s compared to replacing my file server or losing 50 TiB of photos, graphics, drawings, and data.

Virtual FreeNAS for Testing

So…

I needed a break from my political ranting. It’s frustrating to know that politicians dumb things down to manipulate masses of people and those same people follow along blindly. The media simply reiterates the puke and it brainwashes people into believing whatever these idiots are serving up in the Koolaid cups.

To give myself a lesson in FreeBSD and FreeNAS I put together a VirtualBox system to test with and configured it to emulate some changes I would like to make in my production system. The changes are mostly security based to make sure services don’t step on or corrupt each other and a reasonable amount of redundancy is achieved.

Here’s the layout I packaged in VirtualBox. Please realize this is all virtual and I’m not using any real hardware. My VM instance utilizes 4 cores and 8 gig of RAM, a bridged LAN adapter with a static IP address attached from within FreeNAS.

2 60 GiB  SATA Mirrored boot drives for FreeNAS OS

2 100 GiB SAS Mirrored Drives for Jails and VM instances

5 120 GiB SAS Drives in RAID Z2 for a data volume

So the desired result would be redundancy for both the boot drive and the jailed applications while keeping them both away from data stored in the volume. Here’s what it looks like in my initial layout:

The last picture is my production system. It’s real hardware.

For me the data is the most important piece. I can rebuild the boot drive and jailed applications without ever touching the data volume. Since both the boot and jails are on RAID1 striped drives I do get redundancy if one of the drives in the  boot RAID1 volume fails. I also get the security of the exposed application being in a jail.

I need to thank a bunch of people at the FreeNAS Forums for their efforts. I have been able to find every answer to my questions simply by reading. The FreeNAS documentation is very good also.

ODroid HC2

OK….

This is a cool little SBC (Single Board Computer) on a big ass heat sink from ODROID. I saw this and thought ‘what can I do with it’. I already use a RPi 3+ and Pi-Hole to run my DNS service inside my local network and to block ads and garbage.ODROID-HC2 
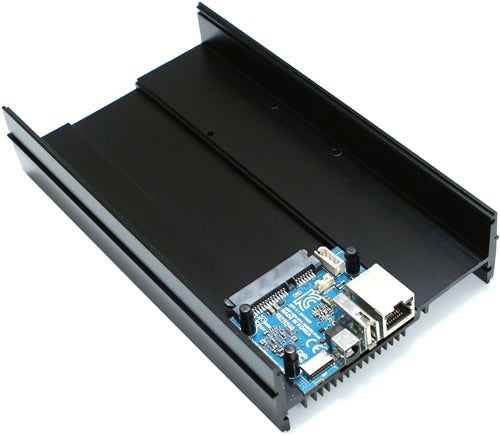
I use an old Dell machine to run my firewall. I built the Freenas system which has so many features and options I haven’t even touched the surface of it yet. What am I going to do with this?

Before I tell you what I did I’m going to explain a bit about this thing and what attracted me to it. First of all cost. The complete package consists of board, power supply, case and the SD card for $78 USD. It’s a bit more than the RPi 3+ but an added feature is the SATA connector which allows you to install a drive onto it. If you use a SSD drive you have a full solid state system. Use a big ass spinning drive and it’s a storage appliance. Dream shit up. Like the RPi, it’s a great project starter.

There are a bunch of pre-packaged OS images for it and a small community out there for support and sharing of ideas, uses and development. Loading the OS onto the SD is straight forward, even easier when you read the instructions first. Duh! A cool thing is with SD cards it was simple to create a few different images and swap them back and forth. As long as the mount and share permissions with the drive are consistent you can swap OS systems on SD cards in seconds.

I started out loading a straight up Ubuntu 16.04 Server package to see how it performed so I could get a better idea of capabilities and what I could possibly do with it. It’s actually pretty fast as long as you don’t bury it with overhead like a desktop GUI. I loaded Webmin and it seemed to handle it fine. They do have a desktop version of Ubuntu 18.04 with Mate as it’s GUI but I didn’t try it.

Next I found a package based on OpenMediaVault. Simple install and worked fine. My issue here is that I just built a FreeNAS system with 50 TB of ZFS storage. Do I really need a 2 TB file server? Nope. But it did work and was straight forward to get the whole thing up and running in minutes.

Next up KODI. Simple and fast install and worked easy. Mount the drive and load up whatever you want. You could spend a few bucks and buy a big drive like a 8, 10, or 12 TB drive and have tons of KODI storage for music and video. Here again My FreeNAS box. I loaded Plex Media Server in a Jailed environment and pointed it to over two thousand  HD movies and over a million tracks of music. I really don’t need KODI.

Odroid offers all kinds of SBC, parts, and pieces for great project starters. Prices are decent if you buy from the US distributor. ameridroid.com rather than Amazon. You wont get you parts the same day but for us in small town USA it really never makes a difference anyway.

So my intention is to make a caching DNS, Pi-Hole server out of it. I’ll keep you posted.


Flashing the LSI SAS 9211 into IT Mode

What a way to start a post. I’m sure the title alone will kill off anybody reading this one. Read it or not. Don’t care. But if you ever have the need to flash a LSI RAID card here it is!

So……

FreeNAS uses a different method of creating a volume of disks than traditional RAID does so the controllers used for the hard drives need to be in a different mode to run them. I am going to control the file system with software instead of hardware. However it is possible to use the same disk controller card to do either traditional or software volumes.

The motherboard I chose to use in my FreeNAS system, Supermicro Micro ATX DDR4 LGA 1151 Motherboards X11SSM-Fis a server quality board and has eight SATA ports built onto it. You can see them in the lower right corner of the picture. The configuration I am creating has the need for fourteen SATA ports. Doing the research for the correct controller card I found through the FreeNAS forums the model of card that was most widely used and proven to work in the configuration of system I am building.


The card I chose was the LSI SAS-9211-8i. This was a part that others have used and it’s a known, proven controller in the FreeNAS system. The card comes in two programmable flavors or modes, IR (Integrated RAID) and IT (Initiator Target). I purchased the card from Amazon however they can be found used, all over the internet and can be purchased in either IT or IR modes. For my application I was after a card in IT Mode since I didn’t require the hardware to control my volume, software was going to handle it. I did however want to make sure I used the latest firmware available so I didn’t care which mode it was in since I was going to upgrade it anyway. Once I was upgrading the firmware I could easily switch it to IT Mode.
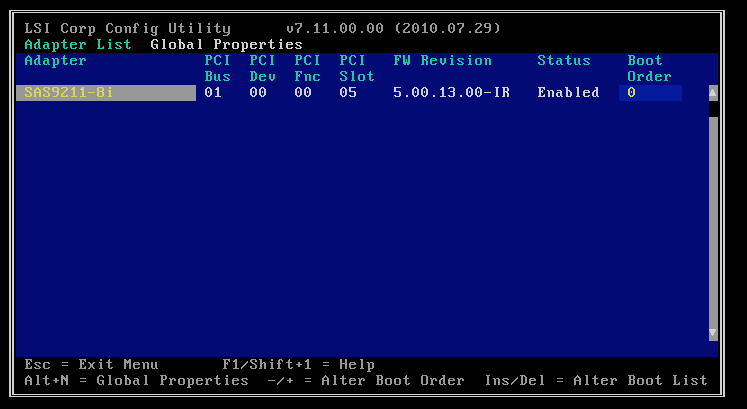
Once again. RESEARCH RESEARCH RESEARCH

Follow along as I step through this. I am using information from other’s sites as well, don’t need to reinvent the wheel, and will properly give credit at the bottom of this post.

I used a Dell Optiplex 980 configured to boot from a bootable, MS_DOS, USB thumb drive I created with Rufus. I pre-loaded the thumb drive with the firmware and updated BIOS for the LSI 9211 to run in IT Mode. Just in case I unplugged the hard drive and CD ROM of the 980 so if I made a mistake it wouldn’t erase the OS I had on the hard drive. I also made note of the 980 BIOS configuration prior to changing it to boot from a USB drive just so I could get it all back together again. It’s not brain surgery so don’t make too much out of it.

Install the LSI 9211 card into a suitable PCI slot and enter its configuration page by pressing CTRL-C during boot Post sequence. You will see a page confirming the model and firmware revision installed on your card as below.In my case, my card is a 9211 with 8 internal ports, firmware 5.00.13.00 in IR (Integrated RAID) mode.

initial_IR_mode

Now reboot from the USB stick and wait for the command prompt to appear. You may need to adjust your BIOS boot settings to enable booting from your USB stick. I did.

C:\

I am going to use the sas2flsh program to perform the update. Enter the command

sas2flsh -o -e 6

This command will put the card into advanced mode -o and then erase the flash memory -e 6.

You should see the following output

C:\SAS2FLSH.EXE -o -e 6
Advanced Mode Set

Adapter Selected is a LSI SAS: SAS2008(B2)

Executing Operation: Erase Flash

Erasing Flash Region…

Erase Flash Operation Successful!

Resetting Adapter…
Reset Successful!

Finished Processing Commands Successfully.
Exiting SAS2Flash.

Lunch time…… I’ll be back. Don’t reboot or shut off the machine! Very important

Check this out! ODROID HC2

I had an idea that was motivated by a user in the FreeNAS forums. OK, not really my idea but I thought this would work for me in my system. Here’s my thought. I use a Raspberry Pi v2 for my Pi-Hole Ad-Blocker.ODROID-HC2 Since this little device can actually run full versions of server level OS, Ubuntu 18.04 LTS, I could take my low resource  applications. Pi-hole, DNS, etc. along with a couple scripts that backup some configurations from FreeNAS, and simply add this to my system. I’m planning on using one of the WD SSD 240 GB drives that FreeNAS didn’t like during the NAS build and use it as an appliance.

Here’s where I bought it: www.Ameridroid.com which is a SF Bay area distributor. I bought board, power supply, case, and 16 GB SD card for $78.00 US. I kind of figure if it doesn’t work I have a RPi on steroids. HAHAHAHA!

Get it? It’s called a ODROID! I crack my self up.


Pi-Hole! Nice name huh?

One thing I had during the FreeNAS build was some time to read and research the FreeNAS forums and other tech related sites. I had built a pfSense firewall after getting frustrated with the lame consumer level products and struggling to make them do what I wanted. pfSense was simple and a straight forward firewall.

During the process I started testing an application for pfSense called pfBlockerNG which is designed to filter all kinds of ads, attacks and all around crap coming from both inside and out side of your network. It works really well.

I also found Pi-Hole. Killer name!

I’ll do a write up on both but I’m using them in combination and it amazing to see what these applications catch. If you think your network is secure your wrong. The other benefit is how each of them deal with ads and pop up iFrame type windows. Even my cell phone is faster!

Week 2 with FreeNAS

So…..

It’s been two weeks since I started learning FreeBSD and the FreeNAS application. I have certainly burned a few brain cells through the process, but have also learned so much I think I’m in over load a bit. Thanks to the community forums at FreeNAS. Without the research vessel the forums and the individuals there provide I would still be bumbling around trying to figure things out to install the system and avoiding the inevitable pitfalls.

I spent a lot of time reading and following the threads to understand more of what not to do so I wouldn’t jump in and build my system with the wrong parts. Avoiding pitfalls was what I was after. I didn’t need to reinvent the wheel and I was looking to build a ‘know quantity’ system that had been proven. The forums are filled with people who try and fail at putting together the wrong parts and lose things rather than taking the advice of others.

So I had a few benefits. One was building a test environment in VirtualBox that was similar to the system I had planned in reality. Trust me, I blew it up a couple times making mistakes but I didn’t lose anything and that was my intention. The other was creating my production system correctly.

In the beginning my intention was to use all surplus parts from all the pieces I had. I did. However I also purchased a couple of the system parts that were key to building a system that would last and be secure. A server level motherboard, ECC RAM and decent power supply started me with a package that would be reliable.


TBC….

FreeNAS, It’s Not for Everyone

Can you say learning curve! I’m not talking YouTube video learning curve, I’m talking full on technical for the really nerdy IT Systems Administrator learning curve.

I feel lucky because I have my own home lab to research my projects before I really get to it. Between virtual machines in the lab and Digital Ocean I can package almost anything in an environment similar to production. If I blow it all up it takes minutes to reassemble it. I blow a lot of shit up during testing!

I totally underestimated FreeNAS. I thought I knew enough about RAID, volumes, clusters, de-dupe and all that stuff to simply walk right on in and have the killer NAS up and running over the weekend. HAHAHAHAHA! Welcome to FreeNAS and ZFS file systems.

I thought I would do some research to get a basic understanding. I knew I was in for a ride when I realized ZFS was originally created by Sun Microsystems. After Sun Microsystems was bought by Oracle the ZFS project was removed from open source. A group of the original design engineers spun the project into OpenZFS in 2013 and maintain it as open source.

Here’s the Wiki link for a ZFS history lesson: Wikipedia, ZFS

Here’s the link to the OpenZFS Wiki: Wikipedia:OpenZFS

Just the names of the companies involved let me know this was enterprise level stuff and not the typical end user Best Buy, Seagate or Western Digital backup system. If you want a storage device to backup your PC and keep your ITunes music on, this aint it! Go to Best Buy and get a USB drive with a pre-loaded app. It will save you some brain cells, sleep, coffee and weeks of reading to get a basic grasp of ZFS.

I’ve reloaded my test rig so many times I think my USB drive started to smoke. I really had to let go of some standards from RAID technology to understand how the whole ZFS thing works. Trust me, I feel like I only read the introduction of a book that’s a thousand pages long.

Amazes me when I consider the individuals that dream this stuff up. There are some really smart people out there. Scary smart.

Parts and Patience

Parts started showing up for the NAS build! Yay. Bad part is all I get to do at this point is look at them, The balance are due today so tonight I can actually start assembling the box.

Patience is watching 9 TB of data being moved around to free up the first set of drives I need to install in the new system. It’s like watching grass grow. Thankfully I stacked a few projects together and knew I would be waiting for parts to ship. But OMG it takes forever.

I pulled extra cables from my home lab setup into the house. One went to the AV cabinet and one into my office. They will be the link between the switches on their own VLAN which I can then route. The idea was to isolate heavy load transfer such as video or music away from normal use data. It will be nice having a 10 GB backbone when I begin moving the data from the other NAS boxes I plan to scavenge disks from.

I pulled all of the unused wire from behind my AV cabinet and was pleased with the result. It’s now a smaller rats nest than before. Only color coded. I swapped out all the mismatched patch cables with black ones except for critical ones which I kept colored. Red for critical, yellow for interconnects and black for devices. I had to laugh when I did it thinking I’m the only one that knows where all this shit goes and someone looking would think it’s just a rats nest of wire and cable. To me it’s cool, so there!

**Update**

So it’s early Saturday morning. I’m kind off feeling let down. A negative about living in a small town and leaving the 24/7/365 lifestyle of Southern California is that Amazon doesn’t deliver same day. Hell I think they have to pay extra to get some dumb ass to drive through the desert to bring shit here! Hazard pay!

I’m down to waiting on two orders, one being additional RAM which I could go forward with what I have to do the initial testing of the system. The other is the two SSD drives that will hold the OS. That’s a show stopper! All dressed up and nowhere to go.

Offloading the first of three NAS boxes I had was a true lesson in patience. It ran almost the entire day and finished up last night. I stripped off the trays and loaded the drives in the new case. I save all kinds of stuff and was able to use two colors of SATA cables red for the SSD OS drives and blue for the data pool drives. It’s cool looking and it’s mine so say what you want about color coding the SATA cables. I don’t care.

© 2024 Dan's Planet

Theme by Anders NorénUp ↑